Please continue for LIVE technical support!

(For sales and fingerprinting services, please contact us at 614.456.1296)

FAQ

Answers to Your Questions About Fingerprinting & Our Services

At Biometric Information Management, it’s important to us that you understand the nuances of how to use our products and solutions, which is why we’ve answered some of our most commonly received questions below. 

Hand reaching out in a position to give a fingerprint

fingerprinting techniques

Beyond that, we also want everyone who uses our fingerprint scanners and other resources to know as much as possible about the process and the factors that affect it, so you can take full advantage of the reliability and convenience they offer. With a rejection rate of less than 1%, our fingerprinting hardware offers top-quality results. 

how can i get a copy of bim's w9?
Group 7
how can i ensure that i capture the highest-quality fingerprints?
Group 7

Remember the Three C’s:

  • Claw: Be sure the applicant’s hand is FLAT on the scanner and not shaped like a claw. All fingers should be together, hand flat, placed about ½ inch below the upper edge of the glass on the scanner.
  • Core: Obtaining detail and minutia features from the fingerprints will increase the quality of the prints. Be sure the applicants’ fingers are flat, with the meaty part of the finger (not the fingertips) directly on the scanner.
  • Clarity: Prints that are too light or too dark will significantly affect the quality. When looking at the prints on the inVize ID software, you should be able to clearly see the details of the arch, loops and whorls of the fingerprints.
what should i do if an applicant has very light fingerprints?
Group 7

As we age, our fingerprints become lighter and more difficult to capture. Additionally, individuals working in certain industries experience dry, cracked hands. Ask the applicant to rub a small amount of the BIM scan gel onto their fingerprints prior to capturing the prints. If scan gel is not available, or if the applicant has extremely light prints, apply a very small amount of Corn Huskers Lotion to the fingerprints and rub it in thoroughly prior to capturing the prints.

dealing with light prints
what should i do if an applicant has very dark prints because of warm or moist hands?
Group 7

Individuals with warm or clammy hands will cause what is known as “haloing” around the fingerprints. Haloing is a result of the fingerprint scanner capturing the radiant heat coming from the hands. A product known as Parkers Perfect is designed specifically for reducing the haloing affect on scanner. Rub a Parkers Perfect towelette or spray a small amount directly onto the glass of the scanner. Once it’s completely dry, capture the applicant’s prints again. If the prints are still dark, rub an alcohol-based spray or pad onto the applicant’s fingertips and capture the prints again.

dealing with haloing dealing with dark prints
what's the best setting to obtain high-quality prints?
Group 7

The FBI recommends a height of approximately 39 inches from the floor to record legible fingerprints. For the average adult, that puts their forearm parallel with the floor, which is the ideal position for fingerprinting.

how can i best deal with a subject who's inadvertently making the process difficult?
Group 7

Sometimes, the person whose fingerprints you’re taking may feel compelled to try to help – which, in reality, just makes the process more challenging, as the subject needs to relax in order for you to get the best prints possible. It’s often helpful to have the subject look away from the fingerprinting device.
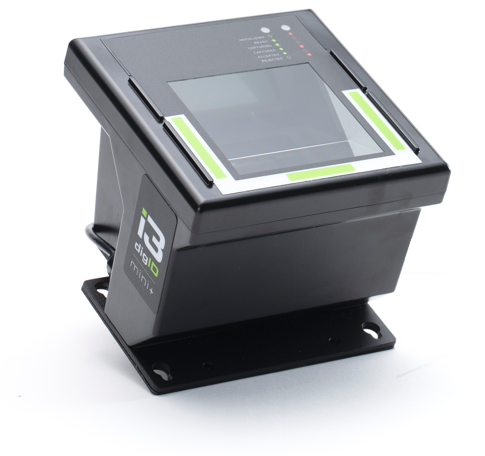
Fingerprint Scanner

technical support

Need to know something about our products, solutions and procedures? You’ve come to the right place. Read on to see the solutions to some of the questions we hear most often.

How Can I Get the Latest Copy of BIM’s Live Scan Service and Support Terms & Conditions?
Group 7
how do i install a printer onto my fingerprint system?
Group 7

In order to add a printer to a computer using inVize ID, you must be logged in as the administrator account.

  1. First, the computer needs to have a printer installed. You can check by going into the Control Panel and opening Devices and Printers. If the printer you wish to add is listed, this step is completed. If not, please install the printer drivers and software first.
  2. Open the inVize ID program and click the hammer icon at the top of the page to open the administrative tools. Then click on Printer Configuration.
  3. Click the Add button and a wizard will pop up.
  4. Click NEXT one time. On the Printer Information screen, choose the printer you wish to use from the drop-down menu. The manufacturer and display name should auto-populate, but if they don’t, you can type that information in manually.
  5. Click NEXT. On the Calibration page, because there is no need to calibrate in most cases, you may click NEXT twice to reach the Settings page.
  6. On the Settings page, uncheck the box that reads “This printer is certified.” Click NEXT twice and then FINISH.

The steps above will add the printer to inVize ID. Before printing your first result, though, you will have to set some defaults. There are many ways to print a result, but here is a common method:

  1. On the Transactions page, click the “+” sign next to a transaction that has received a response.
  2. Left-click once on the “Accepted” response, then right-click on it and choose Print.
  3. The print window will pop up, asking you to select a printer. You can select the printer you added from the steps above.
  4. In the Options box below, choose the Source of your paper. It most cases, this can be set to Automatic. The Orientation should be set to Portrait, and the Duplex Mode can be Simplex or Default.
  5. Lastly, click Print and your results should print.

Please keep in mind you can only print results from your PC if you have NOT selected to mail them directly to a recipient and the results have come back with a Certificate.

how do i create unique user logins for windows and the inVize ID software?
Group 7
adding additional users

First, set up the Windows User Account.

  1. Login to a Windows Administrator Account. For many computers, this might be labeled inVizeID_Admin.
  2. Click on the Start menu and open “Settings.”
  3. Click on “Accounts.”
  4. On the Accounts page, click on “Family & other users.”
  5. Click “Add someone else to this PC.”
  6. When you get the Microsoft account pop-up, follow the prompts to create a local Windows account. If you want to create an account without an email address associated with it, you will need to click “I don’t have this person’s sign-in information,” followed by “Add user without a Microsoft account” on the next screen.
  7. When the account is created, you will see it is a standard “local account” by default. If you need to make it an administrator account, click on the account, then “Change account type” and select the administrator option from the pop-up menu. It is recommended that you create a Standard User account for general fingerprint users; an administrator is only necessary for making changes to the computer or inVize ID, such as running updates, deleting transactions, or changing configurations and permissions.

Second, set up the new account in inVize ID.

  1. Still logged into the Windows Administrator Account, launch inVize ID.
  2. Click on the Administrative Tools icon, which looks like a hammer, or hit F2.
  3. Click on the “Users, user groups, and permissions” option.
  4. You will see a tasks list menu in the upper left-hand corner of the window that pops up, as well as a list of users on the right. The new user you created should appear in the list of users on the right, but under the “Member Of” column, it should be blank. Double-click on the new username. This will bring up a Properties box for that user.
  5. Click to place a check mark in the name of the user group for which you want to add this user. By default, there is an Admin group and a User group. The Admin group should have all permissions available, including the ability to delete transaction and process software updates. The User group should only have the essential permissions to process, save and submit transactions. Once the appropriate box is checked, click OK.
  6. Now you can close the inVize ID software and log out of the Windows Administrator account, as this process is complete.
does it matter which login i use or how i log into the inVize ID software?
Group 7

Yes! Please make sure that you are only logged into one Windows account on the computer at one time. If you need to login to another Windows account, click on the Start menu and choose “Log Out.” Then, choose the “Log Out” button. If you are logged into more than one account at the same time, the software will not work properly.

Below is a detailed explanation of the two Windows accounts that were originally set up on your BIM system:

  • BIM: Setup for initial installation, remote support and a failsafe.
  • inVizeID_Admin: Another administrator account, but used for inVize ID administration, such as running updates, deleting transactions, setting up printers and creating new users. Also used for initial training.
i received notice that an ohio transaction was rejected. what does that mean and what should i do?
Group 7

Occasionally, background transactions may be rejected from either the Ohio BCI or FBI for various reasons (low-quality prints, incorrect demographic information, etc.). When this occurs, the transaction must be resubmitted using the process outlined below.

  1. On the home screen of the software, find the rejected transaction and right-click.
  2. Select “Copy for Resubmission” from the drop-down menu and select the appropriate transaction type (FBI or BCI). A new transaction will appear at the bottom of the screen
  3. Open the new transaction (double-click) and update the rejected information (new prints, demographic information, reason code, etc.).
  4. Save and submit the new transaction information by first clicking on Save (disk icon) and then Submit (PC icon). Your agency will NOT be charged by BCI for resubmitted transactions

If an FBI transaction is rejected a second time, a name check can be requested through BCI. BCI will send a document stating the transaction has been rejected. Complete the necessary information as requested on the form (Individual’s First/Last Name, ICN number for an FBI check).

The rejected transaction form must then be faxed to:
BCI – Name Search Unit
Attn: Resubmission Desk
Fax: 740.845.2633

My Fingerprint System is on, but my Scanner Isn’t Initializing and the Light is Off.

When you launch the inVize ID software, create a new transaction and click on the “2. Fingerprints” link on the left menu pane. You should see a button at the top of the screen that looks like a fingerprint with a green play button in front of it. If that button is not lit up and available to click on, the i3 scanner is not initializing properly. Here is how to troubleshoot this:

  1. First, save the transaction and close inVize ID.
  2. Make sure you are logged into a Windows Administrator Account. For many computers, this might be labeled “inVizeID_Admin.”
  3. Next, ensure that the scanner is plugged into the proper USB port. There are many different computer models used in various setups, so which port should be used is based on which port the scanner drivers were originally installed on. This would be the port that has been used successfully in the past.
  4. If the scanner is not plugged into the proper USB port, plug it into the correct port. If the scanner was plugged into the proper port, unplug it, wait 10 seconds and plug it back in the same port.
  5. Launch inVize ID, open the saved transaction and click on “2. Fingerprints” to see if the scanner button with the green play icon is lit up now. If it is, you can now use the scanner.
  6. If the fingerprint button with the green play icon is still not lit up, leave the scanner plugged in, close the inVize ID software and restart the computer.
  7. When the computer boots back into Windows, login to the same User Account.
  8. Repeat step #5. If the button is lit up, you can now use the scanner.
  9. If, after completing the above steps, the fingerprint button with the green play icon is still not lit up, please click on View menu, select Devices and call Support. Please be ready to provide the status message to the technical support team.
how do i know if i have the latest version of the inVize ID software? how do i get the latest version?
Group 7

Click on the link below to ensure you have the latest version of inVize ID.

inVize ID software updates
I Received One or More Rejections from BCI and/or FBI Containing a Message. What Does This Mean?
Group 7

If you received this message…

“ERRT – Pursuant to Ohio Revised Code 131.02, we cannot provide services to your agency as our records indicate your agency has a delinquent balance over 45 days. Please contact BCI&I’s Finance Section immediately at 740-845-2613 to discuss this issue and reinstate services.”

This issue is usually caused by a billing issue with BCI. You must call BCI and clear up the billing issue to get the account unlocked. Once it is unlocked, you must resubmit the transactions in an administrator account that were rejected for this reason by following these steps:

  1. Highlight and select all of the transactions on the transactions search screen that were rejected due to ERRT. You can do this by holding the Ctrl key and clicking on each TCN.
  2. Once you have selected the transactions, click on the Submit button in the toolbar.
  3. A pop-up box will warn you that you should only resubmit if you have been advised to do so by BCI. Click “YES” to acknowledge this warning and submit the transactions.

have more questions?

If you still have any questions about fingerprinting techniques or software usage, contact BIM today!

Top